

Blogger
Blogger
How to add Widg.io widgets to your Blogger website
How to add the Widg.io Element Script to your website
1.
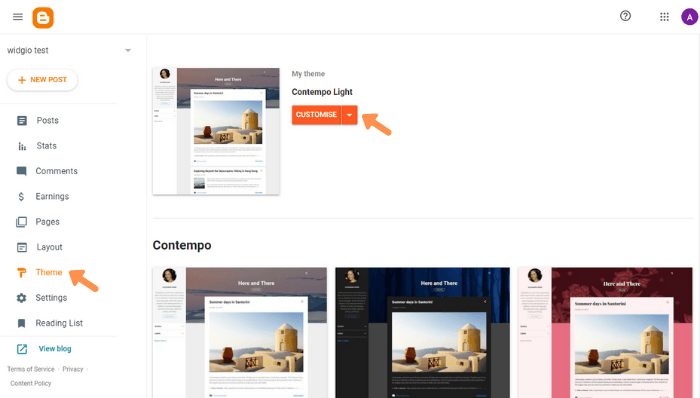
Log into your Blogger account and select the relevant blog/website. From the side menu, select Theme, then select the down arrow on the Customise button and choose Edit HTML
2.
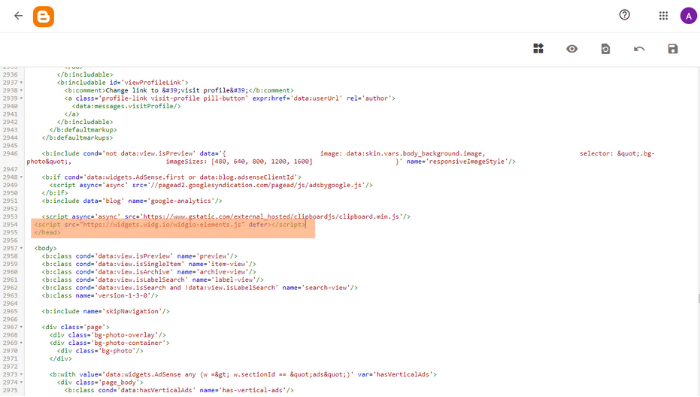
Within the Code Editor, find the closing </head> tag. Copy the Widg.io Element Script, and paste it just above the closing </head> tag. Click the Save icon once completed.
The Widg.io Element Script has now been successfully added to your website.
How to add the Installation Code to make your widget appear on all pages
1.
Log into your Blogger account and select the relevant blog/website. From the side menu, select Theme, then select the down arrow on the Customise button and choose Edit HTML

2.
Within the Code Editor, find the closing </body> tag. Copy the Widg.io Installation Code, and paste it just above the closing </body> tag. Click the Save icon once completed.

The Installation Code has now been successfully added to your website.
How to add the Installation Code to make your widget appear on one specific page
1.
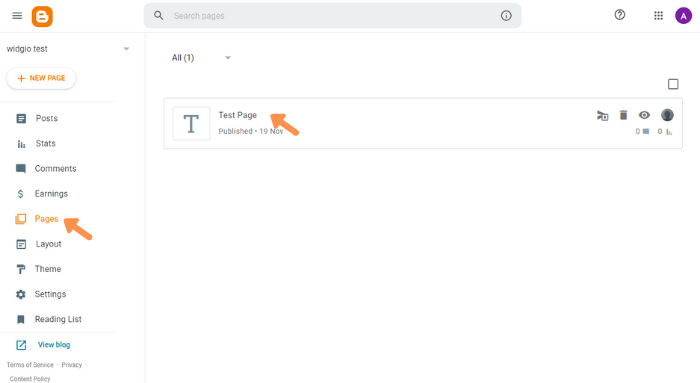
Log into your Blogger account and select the relevant blog/website. From the side menu, select Pages, and then select the relevant Page from the list.
2.
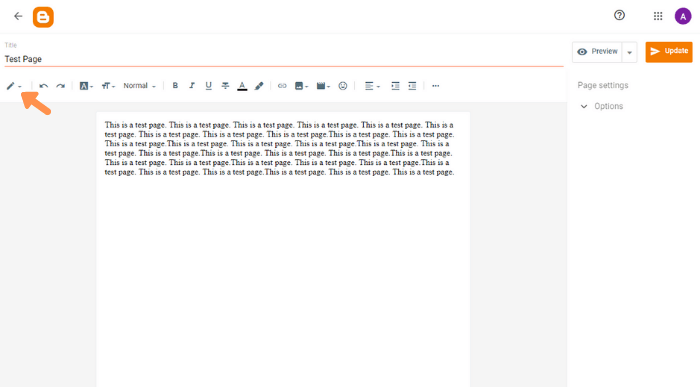
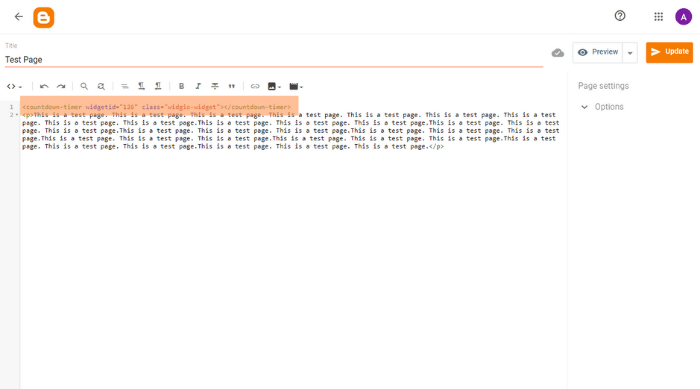
From the page editing options, select the arrow beside the Pencil icon and click HTML View
3.
Copy the Installation Code and paste it into the HTML Editor. Click Update once complete.
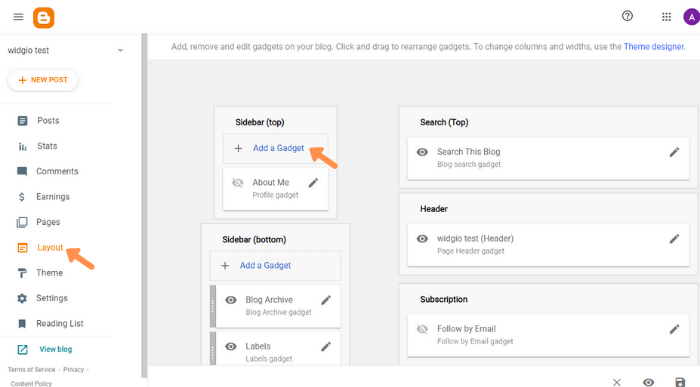
How to add the Installation Code as a Blogger Gadget
1.
Log into your Blogger account and select the relevant blog/website. From the side menu, select Layout and then click + Add a Gadget
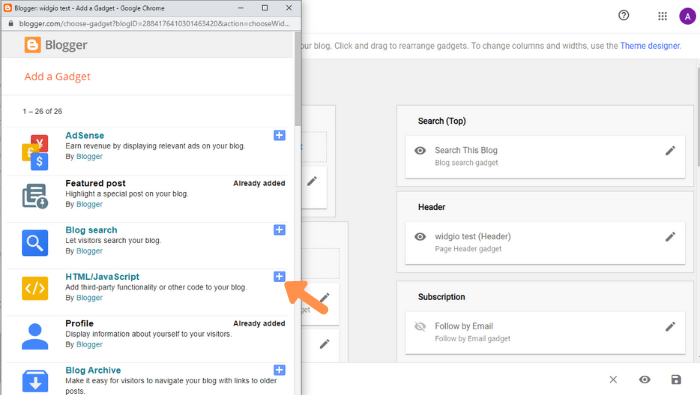
2.
From the list of Gadgets, select HTML/JavaScript
3.
Copy the Installation Code and paste it into the Content field. Click Save once completed.
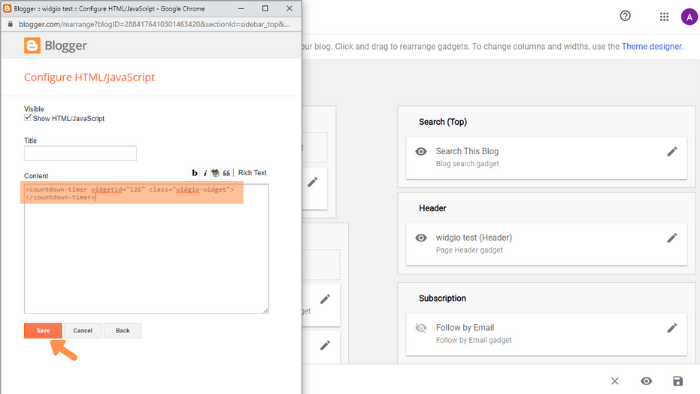
You have now successfully added the Installation Code within a Blogger Gadget.